Articles
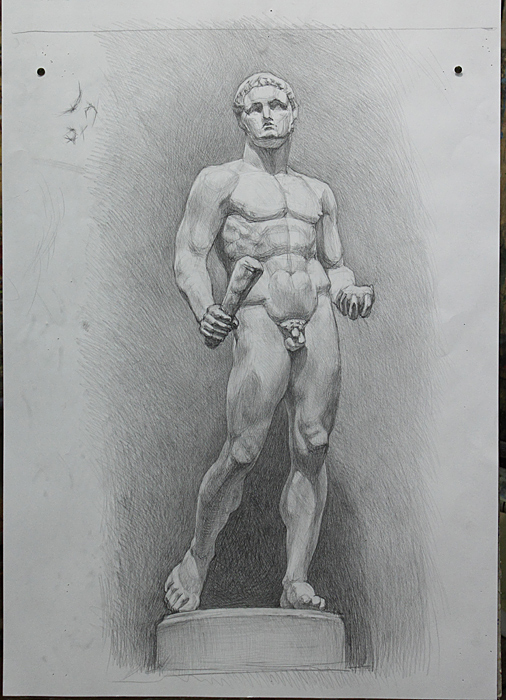
Study Drawing of a Plaster Figure of Heracles.
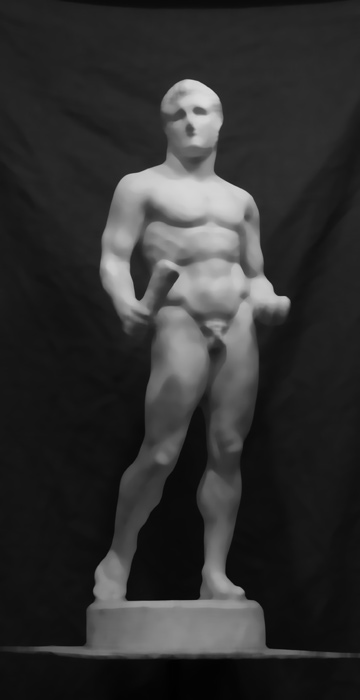
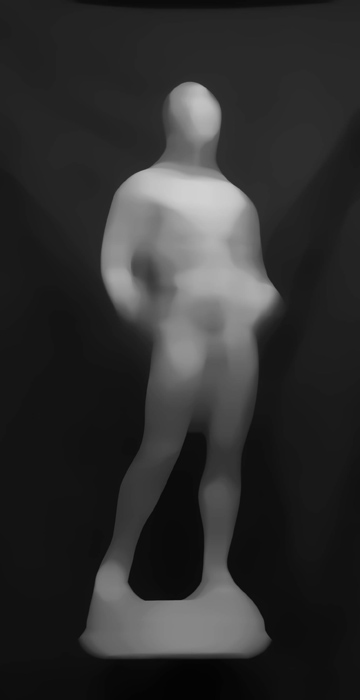
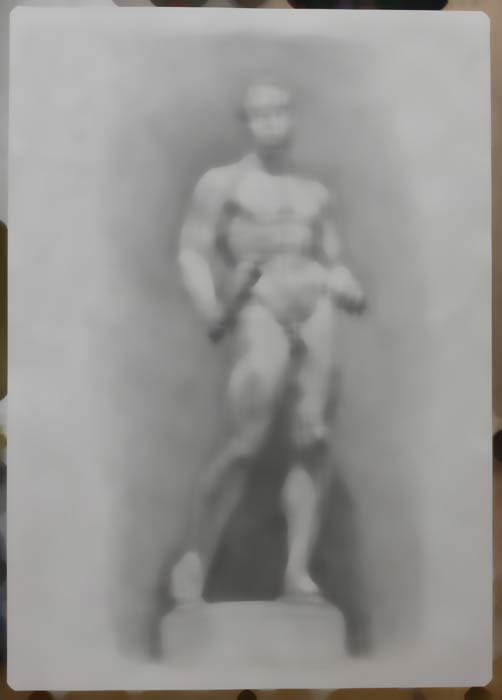
Let us consider the stages of drawing a plaster figure of Heracles.
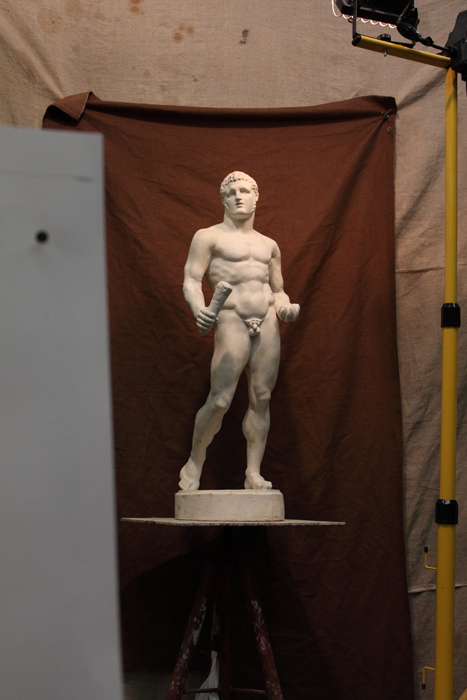
The light source is placed above the model for the form-making effect. At the same time it is important to avoid the appearance of too big shadows.
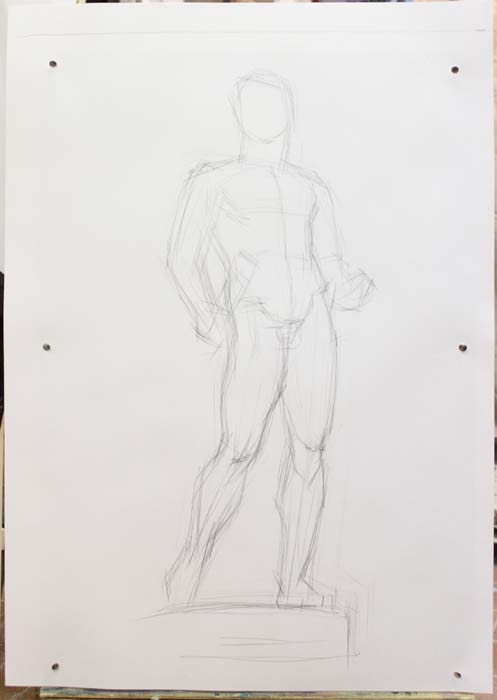
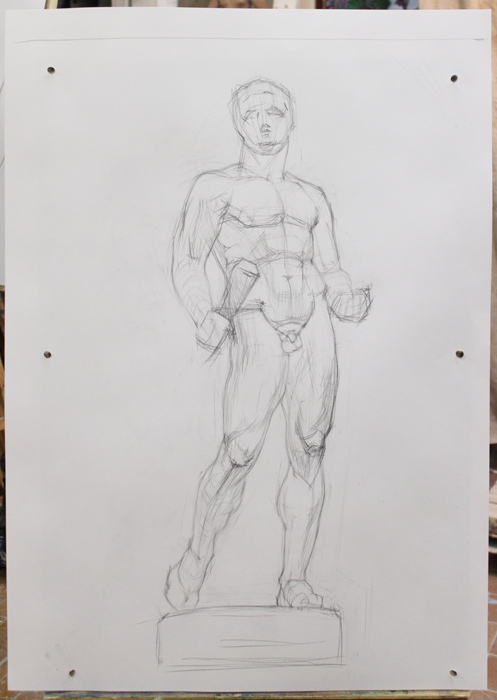
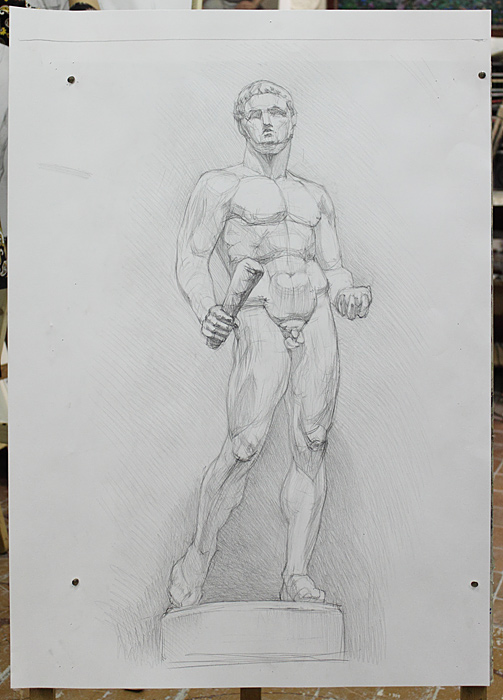
At the beginning the lines should be faint, there is no need of strong pressure to the pencil. Drawing starts with the arrangement of the figure on the paper. The composition must be found correctly from the very first steps, which basically means that proportions and the nature of the model are supposed to be correct.
Otherwise futher changes and elaborations may modify the previous organization significantly.
Anyways, if painter from the very beginning defines what is the most important, (where is the centre), slight alterations will not spoil the composition.
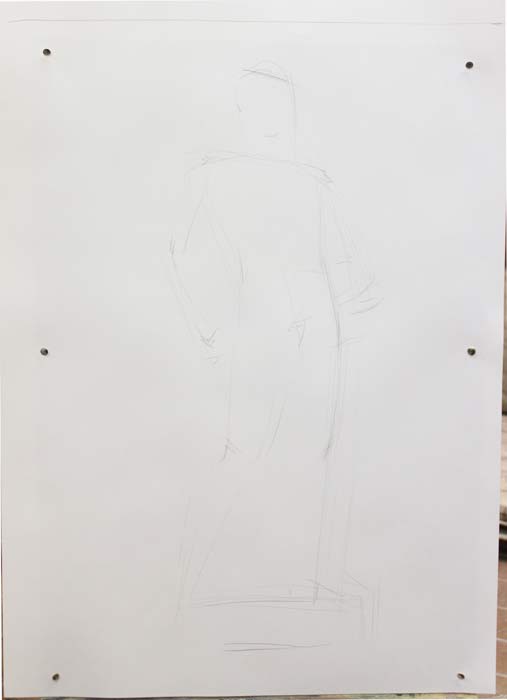
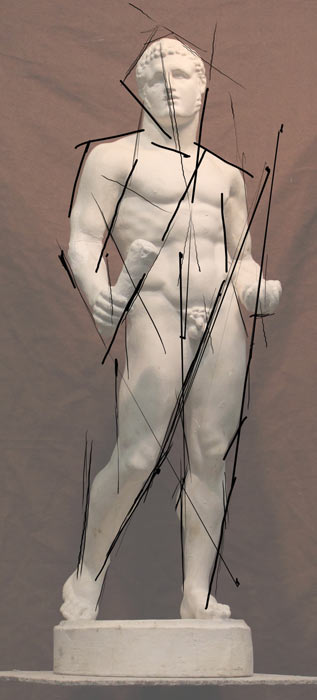
At the very beginning, simultaneously with the composition, it is crucial to catch the entire flow of the figure.

The entire flow of a figure is like a generalized sum of all axes, curves and tilts of the form. It is the solid ensemble of the all positions of the main parts of the body. Hands in this case are secondary. The entire flow is based on the position of torso and legs.
We also should pay attention to the directions of the axes of those parts of body.
As it usually happens, the axis of the head is tilted backwards and, at the same time, slightly to the right. The axis of the neck is tilted forward and slightly to the left shoulder. The chest is leaned back, the axis of the hips is inclined forward. The legs are generally turned forward.
Besides this, chest and pelvis are in “contrapposto”: the pelvis goes down from the side of the resting leg while shoulder of that side goes up. Moreover, as it usually happens in contrapposto, the hip of the supporting leg moves slightly forward, while the hip of resting leg goes slightly backwards. At the same time
the shoulder which is placed above supporting leg slightly goes backwards, while another one – slightly forward. All that tilts together mare the position of torso beautifull and intresting.
Considering all this points we try to convey the entire flow of the figure and the motion of the main parts right away
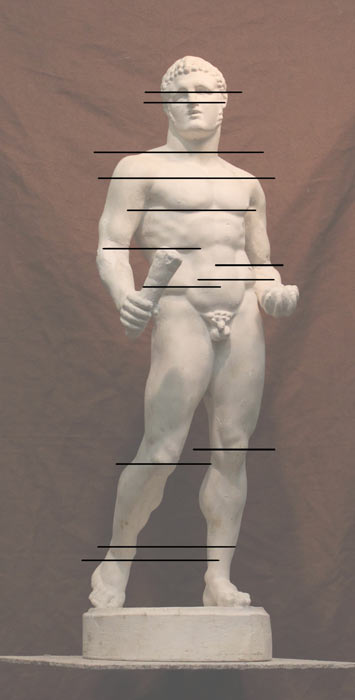
At the same time we need to compare attentively all main proportions, such as: the location of pubis (normally it is in the centre of the figure, but the view from below makes legs to be a little bit longer): the size of the head (an average person is 7 or 8 heads tall, but this particular model has a quiet big head); the location of the main important points (knees, waist, shoulders, elbows, hands, feet, navel, nipples). Placing all that parts we make the position of the figure to appear.
It is useful to take all proportions and directions by eye, and only afterwards to check everything using more mechanical methods.
Let us consider the methods of comparison and checking.
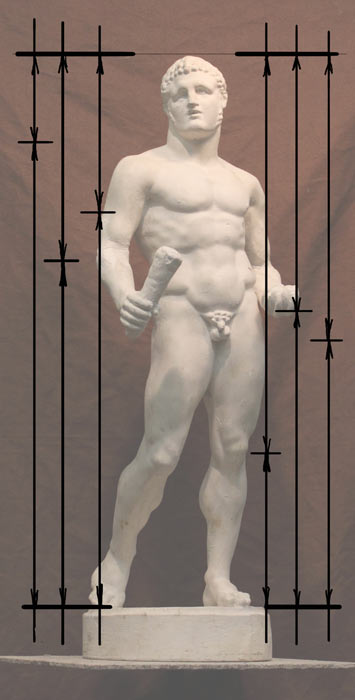
The most basic way to check yourself is the measurement of proportions. First of all it is needed to set the main vertical proportions: the relation of the distances between the foot and the pelvis and
between the pelvis and the crown of the head. Another thing you should check is how many times the length of the head may be placed in the height. Also you may compare the distance between the crown of the head and the navel with the rest of the body, or from the crown of the head to the nipple to the solid figure, and so on. It is highly recommended to create your own ways to check the proportions.
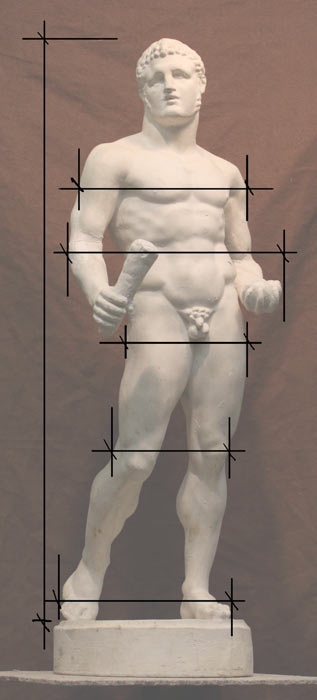
Also it is necessary to check the relation between the main widths to the entire length. As long as the length of a pencil is not big enough, we use a long stick or thin paintbrush. First measure the model, than compare the result with the your work.
Do not forget that the arm needs to be straightened while measuring the model. In addition to, it is preferable to check two or three times before making decision due to the possibility of mistakes.
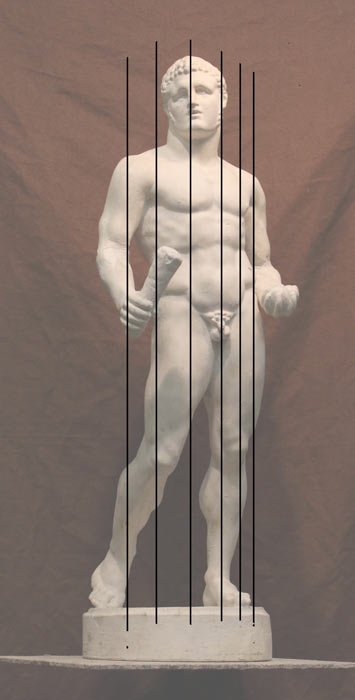
Simultaneously, which is especially important while drawing a figure, you need to observe which points might be joined by one imaginary vertical or horizontal line. To do this we need to direct a pencil or a thin stick at a model. We should mind it to be strictly vertical or horizontal. Compare what you see when you check the model with your drawing.
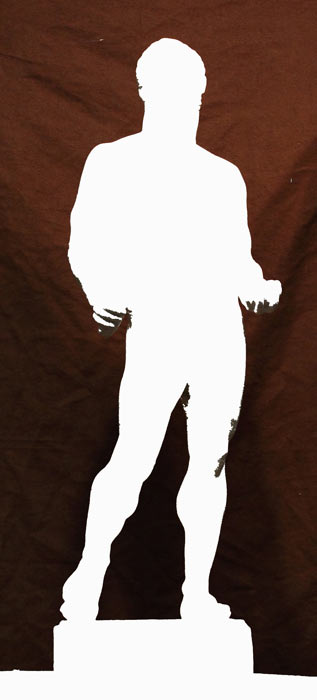
Above-listed methods are efficient as basic ones. In addition to them it is useful to imagine what will happen if you extend the lines. Another way to check your drawing is to pay attention to the shape of the background around the figure.
You should use all these techniques in turn, first defining the location of the main points and taking the most important proportions, then while working on details.
However, we always try to measure everything by eye at first, and only then check the drawing using all above-listed methods.
As long as the main relations are not found, it is highly recommended to not waste the time on working out the concrete silhouettes and small details. It is going to be not just a lavishness of time, but also will have a bad impact on our ability to mind the entire impression. If the artist is concentrated on tiny elements, he or she forgets about the ensemble. As a result, the main relations will be taken incorrectly. Due to this we only slightly delineate the most explicit details, not making them too accurate.
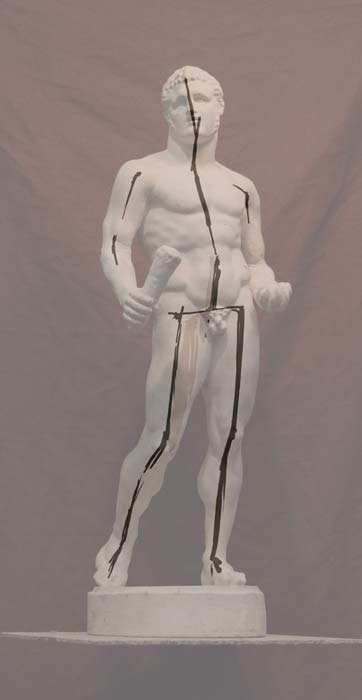
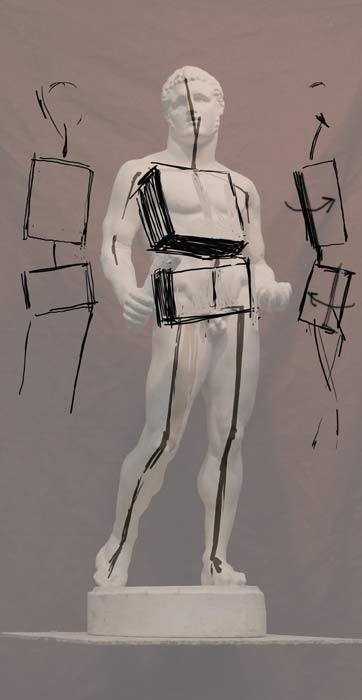
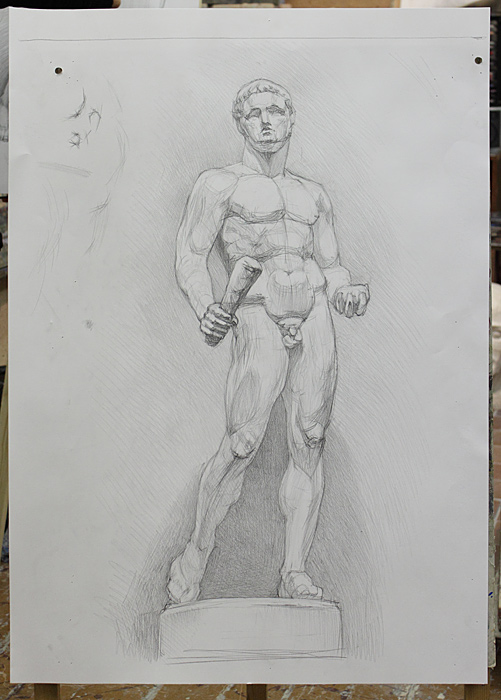
In addition to, almost from the beginning we should pay attention to the “planes” or “surfaces” which has the figure. It will be recalled, that we “planes” are the areas of the form, which are turned to more or less the same direction. “Breaks of the form” are the areas, where two planes meet and the form changes its direction.
The figure, just like a cube, has six basic planes.
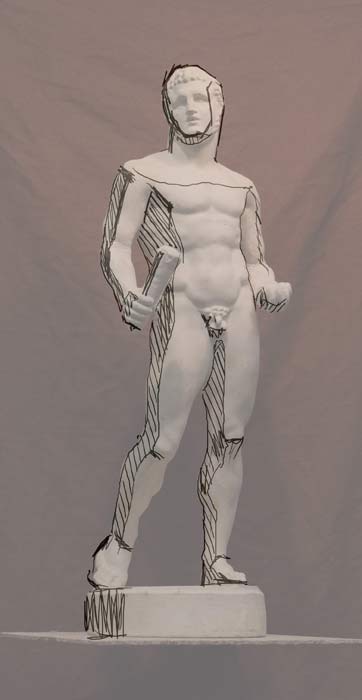
However, each of them has its own plasticity and are divided into plenty of surfaces und sub-surfaces, angled differently. All of them together form the architectonics of the form of the figure.
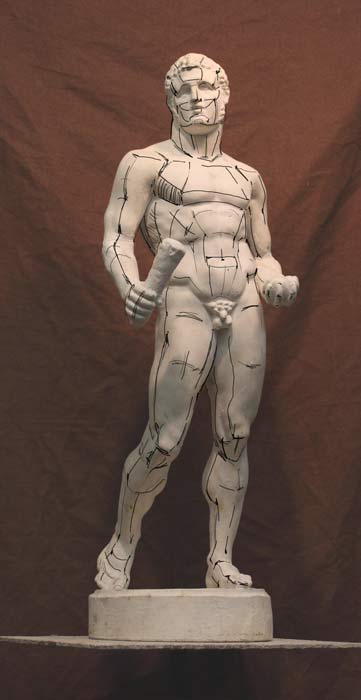
The lines in the picture below indicate the breaks of the form. Nevertheless this outline is quiet relative. In real life all that breaks are soft and plastic.
Step by step we delineate these breaks on our drawing.
It is more sufficient to show the planes softly.
In real life the form turns subtly, which should be conveyed in our drawing.
And, again. We always try to generalize at the beginning. Instead of working out small details it is needed to try to take big turns of the form as expressively as it possible.
Gradually, while placing every separate part, we should simultaneously check the main points mentioned at the beginning: the entire flow of the figure, the main proportions, the arrangement of big parts and important details in a space.
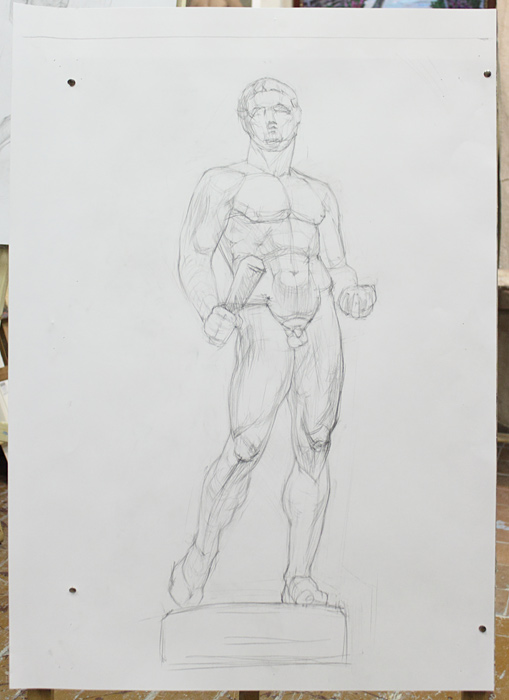
Due to this it is worth to remind the thesis, which has been already mentioned in previous articles: WE DO NOT DRAW DETAILS AS SUCH, BUT WE DRAW DETAILS IN ORDER TO FORM THE ENSEMBLE.

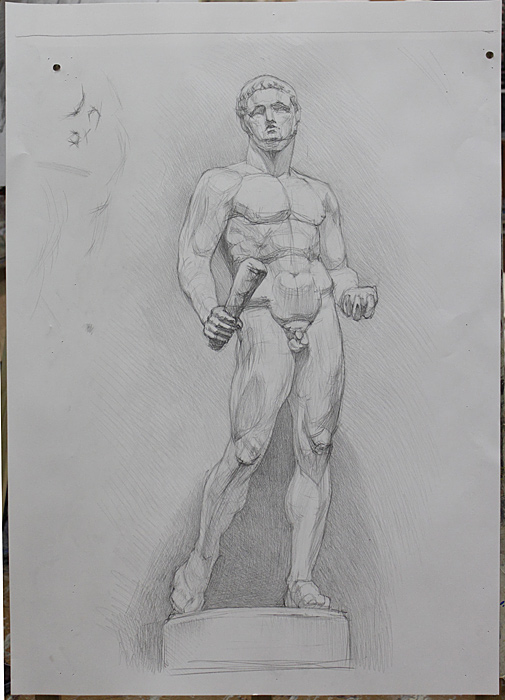
Gradually our drawing becomes tonal. To make sure that we are not concentrate too much on details and in order to avoid the separation between parts it is crucial to compare the chiaroscuro attentively. Meanwhile, it is preferable to not just mind the details,

but observe the situation with defocused eyes and constantly check the entire impression.

The drawing and the model should be compared at a few metres distance. Do not make any decision if you are too closed to your work.
Oleg Toropygin